- 浏览: 2108381 次
- 性别:

- 来自: 深圳
-

文章分类
最新评论
-
wahahachuang5:
web实时推送技术使用越来越广泛,但是自己开发又太麻烦了,我觉 ...
细说websocket - php篇 -
wahahachuang8:
挺好的,学习了
细说websocket - php篇 -
jacking124:
学习了!支持你,继续
初窥Linux 之 我最常用的20条命令 -
aliahhqcheng:
应该是可以实现的,没有看过源码。你可以参考下:http://w ...
Jackson 框架,轻易转换JSON
jMonkeyEngine译文 FlagRush8(2)——增加随机的Flag
8.6、为旗杆增加布
我想要让Flag看起来像…很好,像Flag。为了这么做,我们需要模拟一个布的Flag,attach到旗杆。有什么更好的方式完成这件事,还是使用jME的ClothPatch功能。这将允许我们去创建一个弹簧(spring)点的matrix,它们由不同方向的外力(force)调整(引力和风力)。我已经为这个向导创建了我自己的风力,而我们将在下面讨论。
首先,增加对象到Flag类。
//用于制作Flag的Cloth
private ClothPatch cloth;
//风的参数
private float windStrength = 15f;
private Vector3f windDirection = new Vector3f(0.8f, 0, 0.2f);
private SpringPointForce gravity,wind;
在Flag的构造参数中,我们将创建一个ClothPatch。这个Cloth将是25*25的matrix,给它一个相当详细的cloth。cloth上的点越多,它运行得越慢,所以你应该在flag的视觉外观和它对游戏的影响之间选个平衡点。25*25给我一个可接受的性能和外观的比例。在创建cloth之后,我们将增加我们的force。我们增加的第一个force是我们为这个向导创建的自定义的force,叫做RandomFlagWindForce。我们也将增加一个默认的重力它是由ClothUtils创建的,这将在风减小的时候把Flag拉下来。
//创建一个cloth patch 将处理我们flag
cloth = new ClothPatch("cloth", 25, 25, 1f, 10);
//将我们自定义的风力增加到cloth
wind = new RandomFlagWindForce(windStrength, windDirection);
cloth.addForce(wind);
//增加一个简单的重力
gravity = ClothUtils.createBasicGravity();
cloth.addForce(gravity);
由于cloth是标准的jME Spatial,我们和平常一样应用RenderState。我们将为Flag增加texture,使用jME monkey的logo。这个是一个让monkey的头在你脑海留下烙印的企图。
//创建一个将flag显示的texture,一起推进jME发展!
TextureState ts = DisplaySystem.getDisplaySystem()
.getRenderer().createTextureState();
ts.setTexture(
TextureManager.loadTexture(
Flag.class.getClassLoader()
.getResource("res/logo.png"),
Texture.MinificationFilter.Trilinear,
Texture.MagnificationFilter.Bilinear
)
);
cloth.setRenderState(ts);
当我开始增加一个flag到场景时,我对light非常不满意,因为flag大部分时间都是阴影。因此,我决定增加一个light,它只影响flag。这个light应该跟着Flag移动,并且根据Flag定位自己。因此,使用一个LightNode是最好的解决方案。LightNode允许你对待一个light就像scene中的其它元素一样,通过移动light的父亲node移动它。
//我们将使用一个LightNode去给Flag增加light,使用Node
//是因为它允许light随着FLag移动
//首先创建light
PointLight dr = new PointLight();
dr.setEnabled(true);
dr.setDiffuse(new ColorRGBA(1.0f, 1.0f, 1.0f, 1.0f));
dr.setAmbient(new ColorRGBA(0.5f, 0.5f, 0.5f, 1.0f));
dr.setLocation(new Vector3f(0.5f, -0.5f, 0));
//接下来是state
LightState lightState = DisplaySystem.getDisplaySystem()
.getRenderer().createLightState();
lightState.setEnabled(true);
lightState.setTwoSidedLighting(true);
lightState.attach(dr);
setRenderState(lightState);
//最后是结点
LightNode lightNode = new LightNode("light");
lightNode.setLight(dr);
lightNode.setLocalTranslation(new Vector3f(15,0,0));
attachChild(lightNode);
cloth.setRenderState(lightState);
Flag有一点和前面不同,那就是我们想看到它所有面的三角形。前面,我们设置了scene的CullState去剔除所有背后的三角形。因此,我们将增加另一个CUllState给cloth,让它不要剔除任何三角形。它将看到所有的三角形。
//我们想看flag所有的面,所以我们将关闭Cull
CullState cs = DisplaySystem.getDisplaySystem()
.getRenderer().createCullState();
cs.setCullFace(CullState.Face.None);
cloth.setRenderState(cs);
this.attachChild(cloth);
下一步,我们需要为cloth创建一些点去固定它。如果我们不这么做,整个cloth将在force应用于它身上时被“吹走”。我们需要在旗杆上attach一些点去保住cloth。我们通过设置点的质量为无穷大来这么做。因此,没有任何force能移走它。为了模拟这个方法,一个flag被attach到一个旗杆,flag上边缘的一些和旗杆接触的点将被attach,下面的也是。这些点被设置在一个基础的二维matrix中,所以我们将attach点(0,1,2,3,4)到旗杆,点(500,525,550,575,600)也一样。我们也调整这些点在y的位置让它们偏移,从而让cloth形成一点褶皱。
//我们需要attach一些点到旗杆,这些点不应该被移动。
//因此,我们将attach顶部和底部的5个点去让它们足够高而
//且没有任何forece能移动它。我也稍微移动这些点的位置去
//形成褶皱让它更真实。
for(int i=0; i<5; i++){
cloth.getSystem().getNode(i*25).position.y *= .8f;
cloth.getSystem().getNode(i*25)
.setMass(Float.POSITIVE_INFINITY);
}
for(int i=24; i>19; i--){
cloth.getSystem().getNode(i*25).position.y *= .8f;
cloth.getSystem().getNode(i*25)
.setMass(Float.POSITIVE_INFINITY);
}
最后,我创建自定义风力。为了模仿旗杆上flag的效果,我们也随机化风向。风向将基于它之前的位置
/**
* 在每次update cloth时调用。将轻微调整风向和强度、
*/
public void apply(float dt, SpringPoint node) {
windDirection.x += dt * (FastMath.nextRandomFloat() - .5f);
windDirection.z += dt * (FastMath.nextRandomFloat() - .5f);
windDirection.normalize();
float tStr = FastMath.nextRandomFloat() * strength;
node.acceleration.addLocal(
windDirection.x * tStr,
windDirection.y * tStr,
windDirection.z * tStr
);
}
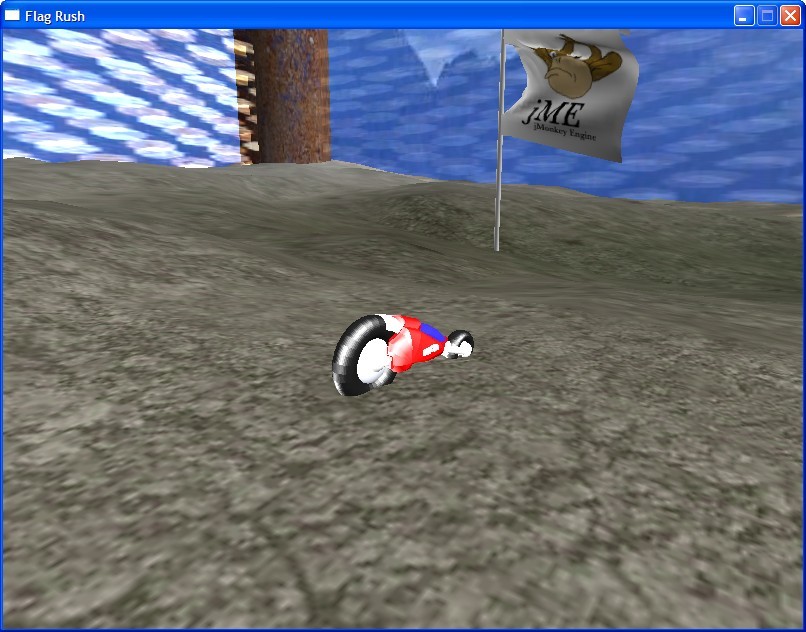
通过那样,我们现在有一个看起来真实的flag,而且我们以自己的方式去为我们游戏中添加元素。下一课,我们只需能获取flag。
8.7、源码
import java.io.IOException;
import java.net.URL;
import java.util.HashMap;
import javax.swing.ImageIcon;
import com.jme.app.BaseGame;
import com.jme.bounding.BoundingBox;
import com.jme.image.Texture;
import com.jme.input.ChaseCamera;
import com.jme.input.InputHandler;
import com.jme.input.KeyBindingManager;
import com.jme.input.KeyInput;
import com.jme.input.thirdperson.ThirdPersonMouseLook;
import com.jme.light.DirectionalLight;
import com.jme.math.FastMath;
import com.jme.math.Vector3f;
import com.jme.renderer.Camera;
import com.jme.renderer.ColorRGBA;
import com.jme.renderer.Renderer;
import com.jme.scene.Node;
import com.jme.scene.Skybox;
import com.jme.scene.shape.Box;
import com.jme.scene.state.CullState;
import com.jme.scene.state.LightState;
import com.jme.scene.state.TextureState;
import com.jme.scene.state.ZBufferState;
import com.jme.system.DisplaySystem;
import com.jme.system.JmeException;
import com.jme.util.TextureManager;
import com.jme.util.Timer;
import com.jme.util.export.binary.BinaryImporter;
import com.jmex.model.converters.MaxToJme;
import com.jmex.terrain.TerrainBlock;
import com.jmex.terrain.util.MidPointHeightMap;
import com.jmex.terrain.util.ProceduralTextureGenerator;
public class Lesson8 extends BaseGame{
private int width,height;
private int freq,depth;
private boolean fullscreen;
//我们的camera对象,用于观看scene
private Camera cam;
protected Timer timer;
private Node scene;
private TextureState ts;
private TerrainBlock tb;
private ForceFieldFence fence;
private Skybox skybox;
private Vehicle player;
private ChaseCamera chaser;
private InputHandler input;
//保存terrain的任何一个给出点的法向
private Vector3f normal = new Vector3f();
private float agl;
private Flag flag;
public static void main(String[] args) {
Lesson8 app = new Lesson8();
java.net.URL url = app.getClass().getClassLoader().getResource("res/logo.png");
app.setConfigShowMode(ConfigShowMode.AlwaysShow,url);
app.start();
}
/*
* 清除texture
*/
protected void cleanup() {
ts.deleteAll();
}
protected void initGame() {
display.setTitle("Flag Rush");
scene = new Node("Scene Graph Node");
ZBufferState buf = display.getRenderer().createZBufferState();
buf.setEnabled(true);
buf.setFunction(ZBufferState.TestFunction.LessThanOrEqualTo);
scene.setRenderState(buf);
buildTerrain();
buildFlag();
buildLighting();
buildEnvironment();
createSkybox();
buildPlayer();
buildChaseCamera();
buildInput();
CullState cs = display.getRenderer().createCullState();
cs.setCullFace(CullState.Face.Back);
scene.setRenderState(cs);
//更新scene用于渲染
scene.updateGeometricState(0.0f, true);
scene.updateRenderState();
}
private void buildFlag() {
flag = new Flag(tb);
scene.attachChild(flag);
flag.placeFlag();
}
private void buildInput() {
input = new FlagRushInputHandler(
player,
settings.getRenderer()
);
}
private void buildChaseCamera() {
HashMap<String, Object> props = new HashMap<String, Object>();
props.put(ThirdPersonMouseLook.PROP_MAXROLLOUT, "6");
props.put(ThirdPersonMouseLook.PROP_MINROLLOUT, "3");
props.put(
ThirdPersonMouseLook.PROP_MAXASCENT,
""+45*FastMath.DEG_TO_RAD
);
props.put(
ChaseCamera.PROP_INITIALSPHERECOORDS,
new Vector3f(5,0,30*FastMath.DEG_TO_RAD)
);
chaser = new ChaseCamera(cam, player, props);
chaser.setMaxDistance(8);
chaser.setMinDistance(2);
}
private void buildPlayer() {
Node model = null;
URL maxFile = Lesson8.class.getClassLoader()
.getResource("res/bike.jme");
try {
model = (Node)BinaryImporter.getInstance().load(
maxFile.openStream()
);
model.setModelBound(new BoundingBox());
model.updateModelBound();
model.setLocalScale(0.0025f);
} catch (IOException e1) {
e1.printStackTrace();
}
//设置Vehicle的属性(这些数字能被认为是单元/秒 Unit/S)
player = new Vehicle("Player Node",model);
player.setAcceleration(15);
player.setBraking(25);
player.setTurnSpeed(2.5f);
player.setWeight(25);
player.setMaxSpeed(25);
player.setMinSpeed(15);
player.setLocalTranslation(new Vector3f(100,0, 100));
player.updateWorldBound();
player.setRenderQueueMode(Renderer.QUEUE_OPAQUE);
scene.attachChild(player);
scene.updateGeometricState(0, true);
agl = ((BoundingBox)(player.getWorldBound())).yExtent;
}
private void createSkybox() {
skybox = new Skybox("skybox",10,10,10);
Texture north = TextureManager.loadTexture(
Lesson8.class.getClassLoader()
.getResource("res/texture/north.jpg"),
Texture.MinificationFilter.BilinearNearestMipMap,
Texture.MagnificationFilter.Bilinear
);
Texture south = TextureManager.loadTexture(
Lesson8.class.getClassLoader()
.getResource("res/texture/south.jpg"),
Texture.MinificationFilter.BilinearNearestMipMap,
Texture.MagnificationFilter.Bilinear
);
Texture east = TextureManager.loadTexture(
Lesson8.class.getClassLoader()
.getResource("res/texture/east.jpg"),
Texture.MinificationFilter.BilinearNearestMipMap,
Texture.MagnificationFilter.Bilinear
);
Texture west = TextureManager.loadTexture(
Lesson8.class.getClassLoader()
.getResource("res/texture/west.jpg"),
Texture.MinificationFilter.BilinearNearestMipMap,
Texture.MagnificationFilter.Bilinear
);
Texture up = TextureManager.loadTexture(
Lesson8.class.getClassLoader()
.getResource("res/texture/top.jpg"),
Texture.MinificationFilter.BilinearNearestMipMap,
Texture.MagnificationFilter.Bilinear
);
Texture down = TextureManager.loadTexture(
Lesson8.class.getClassLoader()
.getResource("res/texture/bottom.jpg"),
Texture.MinificationFilter.BilinearNearestMipMap,
Texture.MagnificationFilter.Bilinear
);
skybox.setTexture(Skybox.Face.North, north);
skybox.setTexture(Skybox.Face.West, west);
skybox.setTexture(Skybox.Face.South, south);
skybox.setTexture(Skybox.Face.East, east);
skybox.setTexture(Skybox.Face.Up, up);
skybox.setTexture(Skybox.Face.Down, down);
skybox.preloadTextures();
scene.attachChild(skybox);
}
private void buildEnvironment() {
fence = new ForceFieldFence("forceFieldFence");
//我们将手工做一些调整去让它更好适应terrain
//首先我们将实体“模型”放大
fence.setLocalScale(5);
//现在,让我们移动fence到terrain的高度并有一点陷入它里面
fence.setLocalTranslation(
new Vector3f(25,tb.getHeight(25,25)+10,25)
);
scene.attachChild(fence);
}
private void buildLighting() {
/* 设置一个基础、默认灯光 */
DirectionalLight light = new DirectionalLight();
light.setDiffuse(new ColorRGBA(1.0f, 1.0f, 1.0f, 1.0f));
light.setAmbient(new ColorRGBA(0.5f, 0.5f, 0.5f, 1.0f));
light.setDirection(new Vector3f(1, -1, 0));
light.setEnabled(true);
LightState lightState = display.getRenderer().createLightState();
lightState.setEnabled(true);
lightState.attach(light);
scene.setRenderState(lightState);
}
/**
* 创建heightmap和terrainBlock
*/
private void buildTerrain() {
//生成随机地形数据
MidPointHeightMap heightMap = new MidPointHeightMap(64,1f);
//缩放数据
Vector3f terrainScale = new Vector3f(4, .0575f, 4);
//创建一个terrain block
tb = new TerrainBlock(
"terrain",
heightMap.getSize(),
terrainScale,
heightMap.getHeightMap(),
new Vector3f(0, 0, 0)
);
tb.setModelBound(new BoundingBox());
tb.updateModelBound();
//通过三个纹理生成地形纹理
ProceduralTextureGenerator pt =
new ProceduralTextureGenerator(heightMap);
pt.addTexture(
new ImageIcon(
getClass().getClassLoader()
.getResource("res/grassb.png")
),
-128, 0, 128
);
pt.addTexture(
new ImageIcon(
getClass().getClassLoader()
.getResource("res/dirt.jpg")
),
0, 128, 256
);
pt.addTexture(
new ImageIcon(
getClass().getClassLoader()
.getResource("res/highest.jpg")
),
128, 256, 384
);
pt.createTexture(32);
//将纹理赋予地形
ts = display.getRenderer().createTextureState();
Texture t1 = TextureManager.loadTexture(
pt.getImageIcon().getImage(),
Texture.MinificationFilter.Trilinear,
Texture.MagnificationFilter.Bilinear,
true
);
ts.setTexture(t1, 0);
//加载细节纹理并为2个terrain的texture设置组合模型
Texture t2 = TextureManager.loadTexture(
Lesson8.class.getClassLoader()
.getResource("res/Detail.jpg"),
Texture.MinificationFilter.Trilinear,
Texture.MagnificationFilter.Bilinear
);
ts.setTexture(t2, 1);
t2.setWrap(Texture.WrapMode.Repeat);
t1.setApply(Texture.ApplyMode.Combine);
t1.setCombineFuncRGB(Texture.CombinerFunctionRGB.Modulate);
t1.setCombineSrc0RGB(Texture.CombinerSource.CurrentTexture);
t1.setCombineOp0RGB(Texture.CombinerOperandRGB.SourceColor);
t1.setCombineSrc1RGB(Texture.CombinerSource.PrimaryColor);
t1.setCombineOp1RGB(Texture.CombinerOperandRGB.SourceColor);
t2.setApply(Texture.ApplyMode.Combine);
t2.setCombineFuncRGB(Texture.CombinerFunctionRGB.AddSigned);
t2.setCombineSrc0RGB(Texture.CombinerSource.CurrentTexture);
t2.setCombineOp0RGB(Texture.CombinerOperandRGB.SourceColor);
t2.setCombineSrc1RGB(Texture.CombinerSource.Previous);
t2.setCombineOp1RGB(Texture.CombinerOperandRGB.SourceColor);
tb.setRenderState(ts);
tb.setDetailTexture(1, 16);
tb.setRenderQueueMode(Renderer.QUEUE_OPAQUE);
scene.attachChild(tb);
}
protected void initSystem() {
//保存属性信息
width = settings.getWidth();
height = settings.getHeight();
depth = settings.getDepth();
freq = settings.getFrequency();
fullscreen = settings.isFullscreen();
try{
display = DisplaySystem.getDisplaySystem(
settings.getRenderer()
);
display.createWindow(
width, height, depth, freq, fullscreen
);
cam = display.getRenderer().createCamera(width, height);
}catch(JmeException e){
e.printStackTrace();
System.exit(-1);
}
//设置背景为黑色
display.getRenderer().setBackgroundColor(ColorRGBA.black);
//初始化摄像机
cam.setFrustumPerspective(
45.0f,
(float)width/(float)height,
1f,
5000f
);
Vector3f loc = new Vector3f(200f,1000f,200f);
cam.setLocation(loc);
// Vector3f left = new Vector3f(-0.5f,0.0f,0.5f);
// Vector3f up = new Vector3f(0.0f,1.0f,0.0f);
// Vector3f dir = new Vector3f(-0.5f,0.0f,-0.5f);
// //将摄像机移到正确位置和方向
// cam.setFrame(loc, left, up, dir);
//我们改变自己的摄像机位置和视锥的标志
cam.update();
//获取一个高分辨率用于FPS更新
timer = Timer.getTimer();
display.getRenderer().setCamera(cam);
KeyBindingManager.getKeyBindingManager().set(
"exit",
KeyInput.KEY_ESCAPE
);
}
/*
* 如果分辨率改变将被调用
*/
protected void reinit() {
display.recreateWindow(width, height, depth, freq, fullscreen);
}
/*
* 绘制场景图
*/
protected void render(float interpolation) {
//清除屏幕
display.getRenderer().clearBuffers();
display.getRenderer().draw(scene);
}
/*
* 在update期间,我们只需寻找Escape按钮
* 并更新timer去获取帧率
*/
protected void update(float interpolation) {
//更新timer去获取帧率
timer.update();
interpolation = timer.getTimePerFrame();
input.update(interpolation);
chaser.update(interpolation);
flag.update(interpolation);
fence.update(interpolation);
//我们想让skybox一直在我们的视野内,所以让它和camera一起移动
skybox.setLocalTranslation(cam.getLocation());
//我们不想chase camera走到世界下面,因此让它一直在水平面上2个单元。
if(cam.getLocation().y < (tb.getHeight(cam.getLocation())+2)) {
cam.getLocation().y = tb.getHeight(cam.getLocation()) + 2;
cam.update();
}
//确保当玩家离开平面时我们不会坠落。
//当我们增加冲突时,fence将做它自己的工作并保持玩家在里面。
float characterMinHeight =
tb.getHeight(player.getLocalTranslation()) + agl;
if(
!Float.isInfinite(characterMinHeight) &&
!Float.isNaN(characterMinHeight)
)
player.getLocalTranslation().y = characterMinHeight;
//获取terrain在我们当前位置的normal。
//我们然后将它应用到player上面。
tb.getSurfaceNormal(
player.getLocalTranslation(),
normal
);
if(normal != null) {
player.rotateUpTo(normal);
}
//当Escape被按下时,我们退出游戏
if(KeyBindingManager.getKeyBindingManager()
.isValidCommand("exit")
){
finished = true;
}
//由于我们改变了场景(移动skybox),我们需要更新scene graph
scene.updateGeometricState(interpolation, true);
}
}


发表评论

相关推荐
FlagRush8——增加随机的Flag FlagRush9——墙壁检测系统(Detection System) FlagRush10——墙壁检测系统(Detection System) 如果确实没分下载,到我博客看看吧,这些文章那里都有。有分的就支持一下我咯。 ...
2、 从你的应用程序中移除SimpleGame 8 2.1、Main 8 2.2、InitSystem 9 2.3、InitGame 13 2.4、Render和update 14 2.5、reinit和cleanup 15 2.6、总结 16 2.7、源码 16 3、 加载地形 20 3.1、创建一个heightmap 21 ...
jmonkeyengine是一个面向冒险的java开发人员的三维游戏引擎。它是开源的、跨平台的、尖端的。3.2.4是jmonkeyengine 3 sdk的最新稳定版本,是一个完整的游戏开发套件。我们将发布3.2.x更新,直到主要的3.3版本到来。
Jmonkeyengine 3.0 Beginners Guide
jMonkeyEngine(jME)是一个开源的Java 3D引擎,它的效果非常好,速度也不错
NULL 博文链接:https://hjk685.iteye.com/blog/1912303
jMonkeyEngine 3.0 Beginner's Guide
sdk, 在netbeans上,基于 jMonkeyEngine3 SDK jMonkeyEngine软件开发工具包( SDK ) 欢迎使用jMonkeyEngine软件开发工具包( SDK )的知识库。 这个SDK使用jMonkeyEngine简化了 3D 个应用程序的开发。 它包含开发完整...
共12章JME中文教程,演示代码经测试无错
jmonkeyengine, 在Java中,一个完整的3D 游戏开发 jMonkeyEngine jMonkeyEngine是一款用于冒险Java开发人员的3D 游戏引擎。 它是开放的,跨平台的,和cutting的。 3.2.0是 jMonkeyEngine 3 SDK的最新稳定版本,一个...
jmonkeyengine:纯Java编写的一个完整的3D游戏开发套件
NULL 博文链接:https://snake.iteye.com/blog/578982
JME学习文档 中文版 jMonkeyEngine 入门学习
jMonkeyEngine软件开发套件(SDK) 欢迎使用jMonkeyEngine软件开发套件(SDK)的存储库。 该SDK简化了使用jMonkeyEngine开发3D应用程序的过程。 它包含开发完整应用程序所需的一切。 我们的SDK(或jmonkeyplatform...
赛车游戏 使用 JMonkeyEngine 创建的赛车游戏。 汽车的转向非常僵硬。 按住 F 将车轮摩擦设置为 0 并改为漂移。
jMonkeyEngine是一个众所周知且广泛使用的免费开放源代码游戏引擎。 该演示应用程序展示了最新的jME版本jME 3的功能和某些功能。jMonkeyEngine使用OpenGL作为其图形库。 该软件包含的一些功能包括:粒子效果,水渲染...
Voider 该游戏正在创作中。 这样做的基本思想是创建一个刺客信条Unity副本,但差别很小。 它是用Java编写并在Blender中设计的。 目前,登录,加载屏幕,游戏gui和游戏开始部分完成。 主要类别尚未连接,因此您必须...